가장 먼저 jetbrains에서 Intellij IDEA를 설치합니다.
다운로드 IntelliJ IDEA: 우수성과 인체 공학이 담긴 JetBrains Java IDE
www.jetbrains.com
상용 버전의 경우 Spring을 바로 설정할 수 있지만 커뮤니티 버전의 경우 https://start.spring.io/ 사이트에 접속하여 Spring 프로젝트를 생성해야만 합니다.
저는 Spring Boot와 Kotlin을 이용하여 웹을 개발할 예정이기 때문에 아래와 같이 설정한 뒤, GENERATE를 이용하여 압축 파일로 저장하였습니다.
Project : Gradle Project
Language : Kotlin
Spring Boot : 2.7.2
Java : 17
Dependencies : Spring Web, Mustache, Spring Data JPA, Spring Boot DevTools, H2 Database

저장한 압축 파일을 해제한 뒤, Intellij의 Import 기능을 이용하여 해당 프로젝트를 불러옵니다.

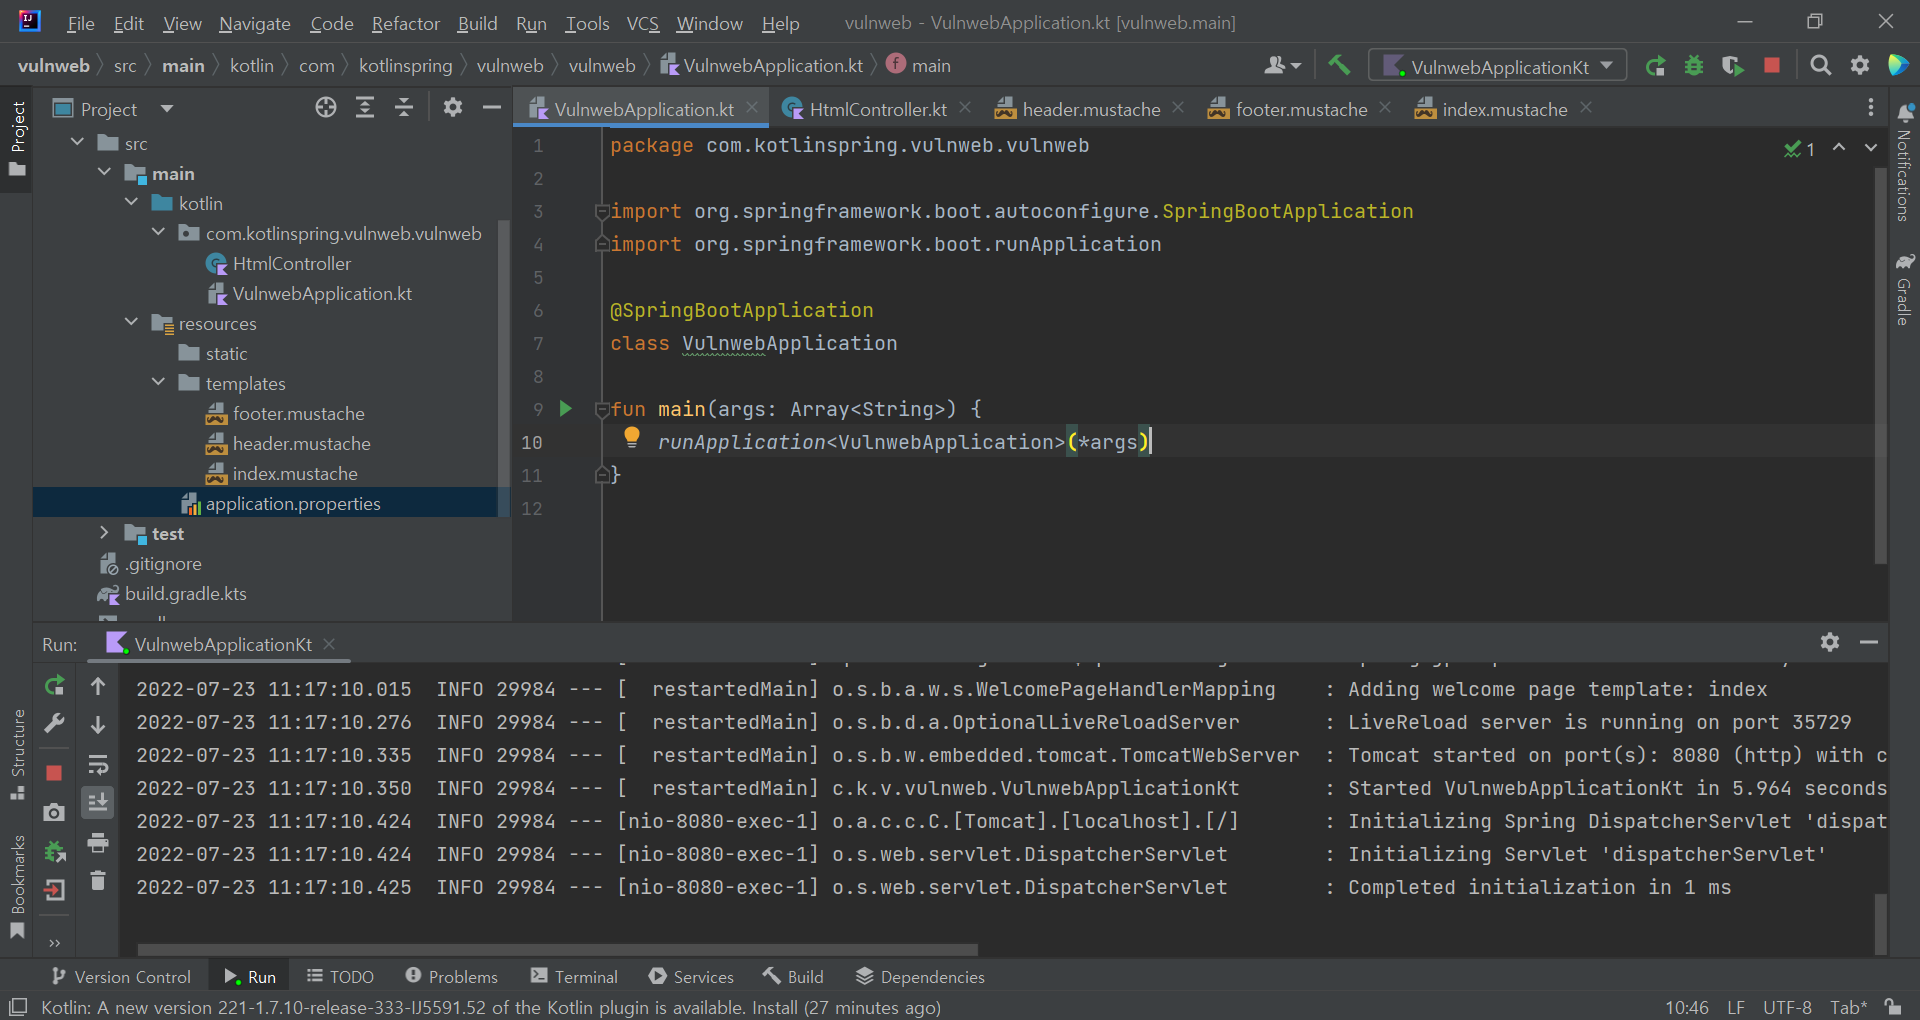
간단한 웹 서버를 만들기 위하여 패키지 내에 컨트롤러를 생성합니다.
위치 : src/main/kotlin/{package}/
HtmlController.kt
package com.kotlinspring.vulnweb.vulnweb

import org.springframework.stereotype.Controller
import org.springframework.ui.Model
import org.springframework.ui.set
import org.springframework.web.bind.annotation.GetMapping

@Controller
class HtmlController {

    @GetMapping("/")
    fun index(model:Model): String{
        model["title"] = "title"
        return "index" // templates file name without file extension
    }
}
그리고 해당 결과를 사용자에게 보여줄 Mustache 템플릿도 생성합니다.
위치 : src/main/resources/templates/
header.mustache
<html>
<head>
    <title>{{title}}</title>
</head>
<body>
footer.mustache
</body>
</html>
index.mustache
{{> header}}
<h1>{{title}}</h1>
{{> footer}}
이후, 프로젝트를 실행 시 http://localhost:8080/에 웹 서버가 연결된 것을 확인할 수 있습니다.


JPA를 통한 DB와 웹 서버 연결
Spring Boot 2.x 버전부터는 CGLIB Proxy 방식으로 Bean을 관리하고 있으며, CGLIB Proxy는 Target Class를 상속받아 생성하기 때문에 "open" 예약어를 이용하여 해당 클래스를 상속이 가능한 상태로 만들어야 합니다.
all-open 플러그인은 아래와 같은 특정 어노테이션이 있을 경우 open을 자동으로 추가시키기 때문에 편의성을 크게 증가시킬 수 있습니다.
- @Component
- @Async
- @Transactional
- @Cacheable
- @SpringBootTest
- @Configuration, @Controller, @RestController, @Service, @Repository, @Component
all-open 플러그인을 사용하기 위해 build.gradle.kts 에 아래와 같은 문구를 추가합니다.
plugins {
  ...
  kotlin("plugin.allopen") version "1.6.21"
}

allOpen {
  annotation("javax.persistence.Entity")
  annotation("javax.persistence.Embeddable")
  annotation("javax.persistence.MappedSuperclass")
}
그리고 속성과 생성자 매개변수를 동시에 선언할 수 있는 Kotlin의 문법을 이용하여 Entity를 만듭니다.
위치 : src/main/{package}/
Entities.kt
package com.kotlinspring.vulnweb.vulnweb

import javax.persistence.Entity
import javax.persistence.GeneratedValue
import javax.persistence.Id

@Entity
class Article (
        var title: String,
        var content: String,
        @Id
        @GeneratedValue(strategy = GenerationType.IDENTITY)
        var id: Long? = null
        )

@Entity
class Users(
        var loginId: String,
        var password: String,
        @Id
        @GeneratedValue(strategy = GenerationType.IDENTITY)
        var id: Long? = null
)
Spring Data JPA 저장소를 선언합니다.
위치 : src/main/{package}/
Repositories.kt
package com.kotlinspring.vulnweb.vulnweb

import org.springframework.data.repository.CrudRepository

interface ArticleRepository: CrudRepository<Article, Long>{
    fun findByTitle(title: String): Article?
}

interface UserRepository: CrudRepository<Users, Long>{
    fun findByLoginId(loginId: String): Users?
}
이제 Mustache의 템플릿을 조금 더 있어보이게 바꿔보겠습니다.
위치 : src/main/resources/templates/
index.mustache
{{> header}}
<h1>{{title}}</h1>
<div class="articles">
    {{#articles}}
            <section>
                <header class="article-header">
                    <h2 class="article-title"><a href="/article/{{title}}">{{title}}</a></h2>
                </header>
            </section>
    {{/articles}}
</div>
{{> footer}}
article.mustache
{{> header}}
<section class="article">
    <header class="article-header">
        <h1 class="article-title">{{article.title}}</h1>
    </header>
    <div class="article-description">
        {{article.content}}
    </div>
</section>
{{> footer}}
수정된 템플릿을 처리할 수 있도록 HtmlController도 업데이트 합니다.
위치 : src/main/kotlin/{package}/
HtmlController.kt
package com.kotlinspring.vulnweb.vulnweb

import org.springframework.http.HttpStatus
import org.springframework.stereotype.Controller
import org.springframework.ui.Model
import org.springframework.ui.set
import org.springframework.web.bind.annotation.GetMapping
import org.springframework.web.bind.annotation.PathVariable
import org.springframework.web.server.ResponseStatusException

@Controller
class HtmlController(private val repository: ArticleRepository) {

    @GetMapping("/")
    fun index(model:Model): String{
        model["title"] = "HackSMS"
        model["articles"] = repository.findAll().map{ it.render() }
        return "index" // templates file name without file extension
    }

    @GetMapping("/article/{title}")
    fun article(@PathVariable title: String, model: Model): String{
        val article = repository
                .findByTitle(title)
                ?.render()
                ?:throw ResponseStatusException(HttpStatus.NOT_FOUND,"This article does not Exist")
        model["title"] = article.title
        model["article"] = article
        return "article"
    }

    fun Article.render() = RenderedArticle(
            title,
            content
    )

    data class RenderedArticle(
            val title: String,
            val content: String
    )
}
마지막으로 데이터를 초기화해줄 클래스를 추가합니다.
위치 : src/main/kotlin/{package}/
DataConfiguration.kt
package com.kotlinspring.vulnweb.vulnweb

import org.springframework.boot.ApplicationRunner
import org.springframework.context.annotation.Bean
import org.springframework.context.annotation.Configuration

@Configuration
class DataConfiguration {
    @Bean
    fun databaseInitializer(userRepository: UserRepository, articleRepository: ArticleRepository) = ApplicationRunner{
        userRepository.save(Users("admin","admin123"))
        articleRepository.save(Article("New Article","Hellow World!"))
        articleRepository.save(Article("Second Article","Bye Bye~"))
    }
}
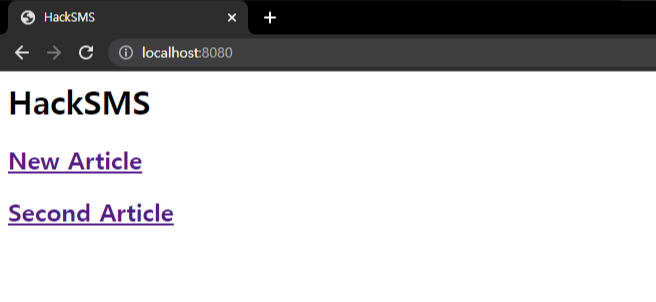
이후, 프로젝트 실행 시 정상적으로 Repository에 저장된 게시글이 보이는 것을 확인할 수 있습니다.


RestController를 이용한 API 서버 구축
이제 @RestController Annotation을 이용하여 HTTP API를 구현해보겠습니다.
위치 : src/main/kotlin/{package}/
HttpControllers.kt
package com.kotlinspring.vulnweb.vulnweb

import org.springframework.http.HttpStatus
import org.springframework.web.bind.annotation.GetMapping
import org.springframework.web.bind.annotation.PathVariable
import org.springframework.web.bind.annotation.RequestMapping
import org.springframework.web.bind.annotation.RestController
import org.springframework.web.server.ResponseStatusException

@RestController
@RequestMapping("/api/article")
class HttpControllers(private val repository: ArticleRepository) {

    @GetMapping("/")
    fun findAll() = repository.findAll()

    @GetMapping("/{title}")
    fun findOne(@PathVariable title: String) = repository.findByTitle(title) ?: throw ResponseStatusException(HttpStatus.NOT_FOUND,"This article does not exist")
}

@RestController
@RequestMapping("/api/users")
class UsersController(private val repository: UserRepository){

    @GetMapping("/")
    fun findAll() = repository.findAll()

    @GetMapping("/{loginId}/{password}")
    fun findOne(@PathVariable loginId: String, @PathVariable password: String) : Users{
        val ret = repository.findByLoginId(loginId)
        if (ret != null) {
            if(ret.password != password){
                ret = throw ResponseStatusException(HttpStatus.BAD_REQUEST,"incorret Password")
            }
        }else{
            ret = throw ResponseStatusException(HttpStatus.NOT_FOUND,"This user does not exist")
        }
        return ret
    }
}
이후, 프로젝트 실행 시 /api 경로로 접근할 경우 RestAPI가 정상적으로 동작하는 것을 확인할 수 있습니다.


'Study > WEB' 카테고리의 다른 글
| [Spring Boot With Kotlin] 오류 별 해결 방안 정리 (0) | 2022.07.24 |
|---|---|
| [Spring Boot] Spring Boot에 사용되는 모듈에 대해서 알아보자 (0) | 2022.07.24 |
| JSP(Java Server page)와 Java Servlet (0) | 2022.07.13 |
| PHP에서 TCPDF로 HTML 화면을 PDF로 변환하기 (0) | 2022.05.18 |
| Wordpress REST API Activation (0) | 2022.05.17 |


댓글